Showing posts with label Papercraft. Show all posts

Wednesday, 28 January 2015

The end of the holidays (sob!)

As I procrastinate my morning away on my first day back at work, I thought I would post a final update on some finished projects.

First up, I managed to make a tear off calendar of my own in time for January to be of some use!  Here are the pages before assembly.

And in the nick of time and after several days of frustration as the spine guilding wasn't working (turns out that varnishing the fabric before guilding is NOT optional) I managed to put my latest two Discworld stamp yearbooks together.  I even found time to put stamps into the 2014 edition!

Oh, and I also assembled/varnished the cute bookend that you see.  Little tip- don't buy the tubes of acrylic paint from Kmart- I used the ENTIRE tube of white to try and paint it and it was so watery that it still didn't cover it properly.  I had to use another paint to give it the final coat.

Craft is going to be on the backburner for a while but I'll post if I come up with anything that might be useful!

Sunday, 28 December 2014

Small monthly desk calendar

At the end of November, there is the annual Hogswatch event for Discworld fans, in the little town of Wincanton, Somerset, England.  But for many fans, including myself, it's a little far to pop in and visit. So instead, several of us got together in a Skype chat and had our own fun.  I wrote* a lovely little quiz and made this little desk calendar as a prize for the winner.  It has a Discworld stamp theme with tear off pages but if you like bookbinding or scrapbooking you should enjoy this and can easily modify it for any theme you like.  It also folds flat which means it is a great present to post.

This post is going up 28th December so if you are sitting around the house, tired from the Boxing Day Sales (or avoiding the shops completly) it's a fun couple of hours (most of that time being design- decision making is hard!)
This small calendar has tear off pages and sits nicely on a desk or table

*well, stole questions from various places online

Materials

  • Various scrapbook papers 7.5 cm x 11 cm
  • One piece of light card 7.7 cm x 23.5 cm
  • Print out of months- I just googled '2015 calendar' and found something that would work for me.  If you are reading this post in a later year, obviously change the year to something suitable!
  • Decorative bits (my theme was a Discworld stamp calendar but you could go with anything you like)
  • Hole punch- smaller holes would work better but you could probably make do with a holepunch.
  • Pretty string (it will be visible and need to hold the calendar together so choose carefully)
  • Needle with an eye big enough for the string
  • Drill with small drill bit
  • Pretty button


Note- all the sizes are based on what I made, with minimal layers on each page.  If you make your pages with lots of layers/thickness you will need to adjust some of these dimensions, particularly for the cover.
Method
Step 1 is the hardest part- deciding what papers to use for what month!

Draw a faint line on the bottom of your calendar, 2 cm from the bottom.  Use this as a guide to make a row of holes for each page using the holepunch.  This is what will let you tear away months as they pass.  Spacing of the holes will depend on what size punch you have.  If you are worried, have a practice on a bit of scrap paper to see what is the best spacing to allow you to tear away later.

Layout and glue down the bits to make your calendar up.  Make sure you keep your work above the row of holes.

Now for the cover.  Take the card and score at the 2.5, 3, 14, 14.5 cm lengths (if your pages are thicker then adjust here accordingly).
Scoring the lines with a knife or a bone folder (note- not actually made of bone these days!) is crucial for crisp folds

Fold at the score marks and check if your pages fit into the cover correctly.
Horray, the pages fit in nicely!

Now to mark out the dots to drill with.  Exact measurements don't matter, provided things look symmetrical.  You want to make three holes in a triangle, with one dot in the middle and further from the bottom than the other two.  See the picture and you'll see what I mean.
Location of holes and numbered so you can follow the next bit.  Note my incredibly useful little hand drill
Use bulldog clips to hold everything together, cover and pages, while you drill the holes.  Another bit of scrap paper is useful to prevent marks being left on your cover.

Appearance after step 1
Now to sew it all together.  Take a long length of string (about a meter.  You won't use it all but it is much better to have too much than too little!) and thread it onto the needle.  To sew, refer to the diagram above to follow along with each hole:

  1. Starting from the front, go through hole 2 leaving a length of around 10 cm of string.  
  2. Go through hole 2 again from the front and pull tightly.
  3. From the back, bring the needle through hole 1 to the front, then loop the thread around the bottom and bring the needle through hole 1 again from back to front.
  4. Loop the thread around the left side of the book and through hole 1 again from back to front.
  5. Put the needle through hole 2 from the front and bring the thread around the left side to the front before putting the needle through hole 2 again from front to back.
  6. On the back, put the needle through hole three to bring it to the front.  Take the thread to the back around the base and back through hole 3 .
  7. Take the thread to the back again and through hole three.
  8. Bring the needle through hole 2 and you should have the pattern now completed.

Tie the threads off (a drop of clear nail polish is a good way to secure the knot) but leave about 10 cm of length for each.

The threads will be used to wrap around a button to hold the cover closed or open in place on a desk.  Just put the button onto the cover, use a pencil to mark where the holes are and punch out with a needle or holepunch.  Sew the button into place and tie string off at the back.

And you are pretty much done.  I prettied up the cover, just because I could but you could also leave it plain if you preferred.

Saturday, 24 September 2011

Probably the only card posts I will make

There are those that find joy in making cards.  Those who find delight in finding just the right paper.  In stamping or drawing or cutting or punching or brayering or embellishing or [insert any number of other techniques in here].  In adding ribbons or distressing or embossing.  In sort, creating disposable* pieces of artwork to give to another.  I am not one of those people.

Which is odd really, because both my Mum and my sister are.  My mum has a room devoted to craft, 99% is for cardmaking.  The other 1% is all the bits left over from her dabbling in a wide variety of other crafts that I raid when appropriate (why no, I have no idea where I got my crafty genes from :P).  My sister is following in her footsteps with only her smaller budget and three small children to keep her supplies and output smaller.  I'll see if I can convince them to let me show some of their pieces in future posts.

Myself, I just make cards when I need to- which basically translates to when I need to give either Mum or my sister a card for birthdays.  When I'm giving a card to someone else I just go and take a card from their finished boxes.  It has become something of a running gag in my family when I do make a card (once I wrote 'DIY card' on a plain card and enclosed it with the pile of craft supplies I bought Mum for her birthday).  Other times I get lucky and use a card to mount something such as a piece of embroidery such as the embroidered card kit I made a month or so ago.

So basically my point is, this is not going to be a blog that talks about card making a lot.  But yesterday my sister held a Stampin' Up party (for those not in the know this is a company that operates on the party plan model, like Tupperware, and sells card and scrapbook supplies).  So partly to be a supportive sister, partly out of curiosity I went and I made two cards.  So without further ado, here are the only two classic cards I'm likely to post.

The first one I like- it's a nice birthday card that's not terribly kiddy or gender biased.  The Happy Birthday was stamped and then the letters water-coloured in.  The penants were made using a stamp and punch combo that look pretty but would cost $100 to get the set (and since I'm not into making cards, that would work out to a very large cost per card so no, I didn't buy them).  And the paper, ribbon and embellisments are also from the company.
The second card was more of a gift tag and... well let's just say that I made it later in the night and the concentration was well and truely gone.  So after stamping the back, I turned the card over and stamped the front.  Upside down.  So then I tried to fix it by using snowflake stamps. And then the glue splurted out.  And I tried to colour in the stamp with the thick end of a pen.  And... 
 Oh well, perhaps I'll end up using it for a Kris Kringle card or something.  Or bury it deep in a secret location and never speak of it again!

So while I did make one nice card, the party did not convince me that I really would like card making if only I gave it a chance.  And even if I did, the stuff was far too expensive for my tastes (a typical set of rubber stamps was around $40).  While nice quality, that's too rich for my blood.  If I spend that much money on a craft at one time I'd like to see more stuff or know I'll get a lot of use out of the stuff.

Thursday, 14 July 2011

Decoupage stamps

I'm rapidly approaching the end of my holiday.  Lots of projects in intermediate steps but I did manage to get something done to share with you today- another fun project you can do with stamps.

The stamp that's staring in today's project is the latest stamp produced by Strapper's Stupefying Stamp Co.  This stamp shows a lovely picture of Strapper walking through The Fidgety Forest.  The Fidgety Forest is the first book about the tales of Strapper and is written by Peter Yorke, with illustrations by Alan Bailey.   The book is very reminiscent of Enid Blyton's short stories with a dash of The Enchanted Wood series and I do recommend it.

But let's get back to the stamps.  This technique works well with most stamp designs.  I've made many of these using Discworld Cinderellas (because I had spares) but I've also seen it done using cancelled regular stamps.  For most stamps you will need four copies.  This gives you about as much depth as you are going to achieve on something this size (this particular stamp measures 35 x 29 mm).

You will also need:
  • silicon-  I use some acid free silicon from a local craft shop (Riot or Lincraft for Melbournians)
  • A sharp knife- I use Excel knife.  I think it's this one, but I'm not 100% sure, I bought it several years ago.  I've tried a lot of knives over the years and what you want is something with a nice fine point and SHARP!  You are far more likely to cut yourself and wreck your project with a blunt, cheap knife.
  • toothpicks- these make it much easier to apply controlled amounts of silicon
  • possibly a metal ruler to let you cut straight lines
  • card to make your project on (I like black but that's entirely up to you!)
  • A cutting mat
  • something to emboss with (either an embossing tool or a blunt pin or toothpick or dried up pen etc)
Step one- if you are using a different stamp to me you will need to analyse the design.  What is in the foreground of the image?  What is at the back?  Once you have that sorted out, it's time to start cutting.  Take your time and go slow.  Below is the image of the four stamp layers I've cut.  The first stamp is left uncut- that's the background layer.  Then going from left to right, top to bottom are layers 2, 3 and 4.
From left to right, top to bottom:  Layer 1(back), 2, 3 and 4
A word of advice at this point- have somewhere safe to keep your bits!  These can fly away horribly fast.  All you need is one sneeze or puff of wind and you'll need some more stamps!

Next step is to emboss and shape the stamp pieces.  You could skip this step if you wanted, but I find it adds a lot of depth and enhances the detail of the stamp.  You first need to know where you want the shaping from the back of the stamp.  If you have a light box, great!  I don't have one though, so I use a good old fashioned torch.  Place the stamp piece, face down and use a pencil to mark any areas you want to emboss.  Below are my pieces with the tree roots marked out, since I know I want to round the tree trunks down to the roots.
When embossing and shaping, what you do is use a rounded tool the back of the stamp piece that is resting on a soft but firm surface (like a pile of paper or a mouse pad).  Harder surfaces will let you have more detailed embossing- experiment with different tools on different surfaces and just play around with your pieces until you are satisfied.  Below is the front and back of the two layers above after I embossed them (click to embiggen).
Once all the pieces are shaped to your satisfaction it's time to start sticking them down.  First stick the uncut stamp onto your piece of card.
Now use the toothpick to put even sized blobs of silicon onto the back of Layer 2.  Even sized blobs mean the layer will stick out the same distance at all points.  And because silicon does not flatten as it dries, the distance the layer sticks up from the bottom layer will not change once it's dry, which gives us the 3D effect.
Carefully position Layer 2 over the background stamp and lightly press to ensure contact but NOT so hard you squash the silicon out.  You want Layer 2 to sit 1-2 mm above the bottom.  Let this dry.
Once each layer is dry, add the following layers the same way.
When I finished the stamp, I decided I wanted the title to be more prominent so I went back and cut out the 'Tales from Fidgety Forest' from the remainder of Layer's 4 stamp (good tip- keep the offcuts until you are done- they can be handy in case of emergencies).  Because paper is hard to manipulate and almost impossible to glue when you get to the size of individual letters, I cut each word out as a single unit.
And it's done.  Have fun- just make sure you don't cut up any rare stamps in the process!

Sunday, 10 July 2011

How to make a box and lid for anything

This post is not intended to give you a template to make a box (if you want to do that there are tons of great ones out there in internet land), but to describe how to make the perfect shaped box and lid for any object you like.  You will need some scrap paper, a ruler, pencil, sharp knife and the object you want to make the box for.  You may also like something to line your box with- in this tutorial I use sticky backed felt.

First step is to work out what size box your object is going to need.  I'm making a giftbox for the stamp paper mache plate I made a few weeks ago.  The one on the right (the one on the left has gone walkabout.  It's amazing how a small room can have so many black holes in it...)  You need to have a rough idea of the dimensions of the object to the highest, widest and length...est longest point (it's been a long day!).   Round UP to the nearest centimeter (or more if you want a bit more space around the object or if you have a very thick lining.)  For my box, I decided to have it 5 cm high and 11 cm square.

Now on your piece of scrap paper, measure from the corner along one length of the paper to the height length (5cm in my case).  Make a mark.  Then measure from this point the length of your box (11 cm).  Make a mark.  Then measure the height length again and make a mark.  Do the same thing on opposite end of the paper.  Rule a line between each mark- you should have something that looks a bit like this
H= height of finished box, L= length of finished box
Now do the same thing for the other side so you end up with something like this:
Cut away the excess paper, leaving you just the area you marked out:
Next step is to mark out the tabs to hold your box together.  Where they go doesn't matter too much provided that there is a tab for each corner of your box.  Mark out your tabs and then cut away the excess paper to leave you with your template.
Fold your template along the pencil lines and test your box with your object to ensure that it is the right size.  When you are happy with your template, use it to cut out your box material.
Here's my paper template against my box paper
When your box paper is cut out, again fold it where your pencil lines were on your template.  You may find it easier to fold if you first score the fold lines lightly with a knife or something hard and pointy,  I sometimes use an embossing tool as shown below.
Once all your folds are made you are ready to glue your box together.  Put some glue onto your tabs and glue them against the side.  Bulldog clips or large paperclips are useful at holding the tabs in place while the glue dries.
To make your lid, first make a template the exact same way as the base BUT, increase your length and width dimensions by 5 mm.  And the height of the lid can be anything you like- 1 cm is probably the minimum you would want due to the lip of the lid needing to catch the sides, but otherwise the choice is yours.  For my box, I used a lid height of 3 cm.  Check your template against your box for fit and then cut out your box lid and assemble as before.
Finished box
At this point you could be done but if you want to line your box then read on.  To line the inside use your box template to cut out the lining material minus the tabs.  Check the material inside your box, as you may need to trim it slightly for fit.
My lining marked out, ready to be cut out
If you are using something sticky backed like I am, it's much easier to put it in the box if you score the backing where the fold lines are.  Only expose the sticky of the base, leaving the sides with the backing on until you get the base stuck down.  Trim the side lining as needed.

As to what my box is made out of?  Well I have lots of LBE (Little Brown Envelopes), a familar sight to all Discworld stamp fans. Inside each LBE was a selection of stamps, both common and the odd rare stamp, similar to trading cards.  What better gift box for an object made of stamps?

Friday, 1 July 2011

Binding book pages together- sewing signatures together

Welcome to part 2b- sewing book signatures together (Part 2a involved a method to bind single or individual folded pages together).  Wait, what's a signature, I hear you say.  Isn't it the messy scrawl you write a hundred times without thinking but then muck up when you need to sign the back of your credit card?

Well, yes.  And no.  A quick run through on some book terms:

book:  a collection of papers joined together in some way.
spine:  the edge of the book where the pages are joined.
Pile of seven unbound signatures
leaf:  A single piece of paper or page that is part of a book
page: Similar to a leaf but generally refers to one side of the paper (eg, a leaf could be of page 57 with 58 on the other side)
folio: A single piece of paper folded in half.  This will become two leafs or four pages of  book.
signature or section:  a group of folios that are bound together as a unit
text block:  the pages between the covers of the book that form the bulk  This could be made of a single section or signature for a small book or of several signatures joined together for a larger book
endpapers:  Special papers on the inside front and back covers.  These are often decorated in some way, such as marbling.

So with that out of the way, let's get on with the show!  This tutorial covers binding sections together to make a text block.  I'm going to assume that you have your pages folded and placed into the correct order, ready to go.  See Part 1 where I go into this in more detail.

You will also need some other things:
  • Some strong string- I like to use crochet cotton because it comes in a pure white colour that matches paper well, and is strong.
  • Some bands.  The stuff I use is a woven cotton tape about 1cm wide but you could use ribbon.
  • A needle with an eye big enough for your string
  • A fine drill bit and hand drill (or you could use a pin or sewing needle to punch holes through the paper)
  • Paper cut the width of the spine OR some loosely woven thin fabric
  • Ruler, pencil, glue and other bits and bobs
Signatures can consist of any number of folios.  I like to use signatures made of four folios when using office paper.  If you are using thicker or thinner paper you may choose to use less or more folios in each section.

Step one is to mark out where your pages will be sewn through.  First, pile your pages in a neat pile- it may be easy to rig a way of clamping the pages together to stop them moving.  You will also need to know how wide your tape or ribbon is- mine was 1cm but just vary the measurements as needed.  I'll explain further below.
Use a pencil to mark where your holes will go
I used three bands to help hold my book together- for an A5 book this is plenty.  You could get away with two, I just prefer three due to symetry and ease of stitching.  First off, find the middle of your book.  You want your middle band to be centred on the spine- easiest way is to measure out from the centre each way to half the width of the ribbon.  Use a pencil to mark all the signatures for each point.

Then you want to measure for the other two bands.  The exact distance doesn't matter but to look the best and provide the best support, you want to ensure that the top and bottom bands are the same distance from the ends.  Mine are 5cm in from the top and bottom of the spine.  Finally you want holes at each end- about 1cm in from the top and bottom of the page.

All up, you should have 8 marks for your spine, all at the same spacing for each signature.  The spacing should look similar to the picture below.
 With your marks made you are now ready to either drill or use a needle to make holes through all four layers of paper for each section.  Take the pages out of your clamp.  Take one section and open it partially (but not all the way as the fold helps keep all the pages aligned).  Using the needle or the hand drill, make your holes.  You want the holes to be on the fold for every piece of paper and in the same position for every piece of paper- otherwise you'll have pages that are crooked.  Do this for all the holes you have marked for all the sections.
I use a small hand drill to make my holes (the bit size I use is around 0.7mm)
Now we are ready to start sewing!  Take a long length of your string and thread your needle.  I like to work from the last section forward but it doesn't really matter.  Now take a look at the numbers I gave the holes above.  Starting from the back go in at 1, and out at 2.  Place one of your ribbons or bands in position against the spine.  Bring the thread over the band and go in at 3.  Out at 4, again place the band in position and go in at five, out at 6, band in position.  In at 7 and out at 8.  Tada!  You've sewn your first section together!

At this point you should have something looking like above.  The bands are held in place by the string.  You string should also be firmly taunt.  Don't pull it so hard you start ripping the paper, but you shouldn't be able to stick your finger through the slack either.

Now you are ready for your next section (double check your page numbers to ensure you don't sew a section on in the wrong order or upside down as you work!)  Using the same sewing pattern just the reverse order, go in a 8, out at 7 etc.  Make sure your thread goes around the bands, holding them in place.  It's these bands that will hold all the sections together over time.  When you reach the end, stop and pull the string  to remove any slack in the line.  Once you are sure the sections are as close together as possible and the string is not loose, tie a knot between the end of your string and your working length.  This ensures that both sections are well connected at each end by string as well as by the bands.

Take your third section and sew as before to the other end.  This time, when you get to the end you will need to tie it off to the first two.  Take your needle and thread it through the loop connecting section 1 to 2, from the outside of the book, in. As you pull the string through, take it back through this loop to make a knot.  Pull the string gently until the knot is tightened.  This is a kettle stitch, or a half-hitch knot.  You should do this at the end of each section.

Continue in this manner until all your sections are sewn together.  Make sure your string remains taunt as you go so you sections are not loose or wobbly.  Also, make sure your bands don't bunch up as you go- give both ends a light tug at each section.  If you run out of string part way, stop at one of the ends and tie your current string off.  Take your new string and tie it in at the same point before continuing to sew.

When finished, your text block should look like this.

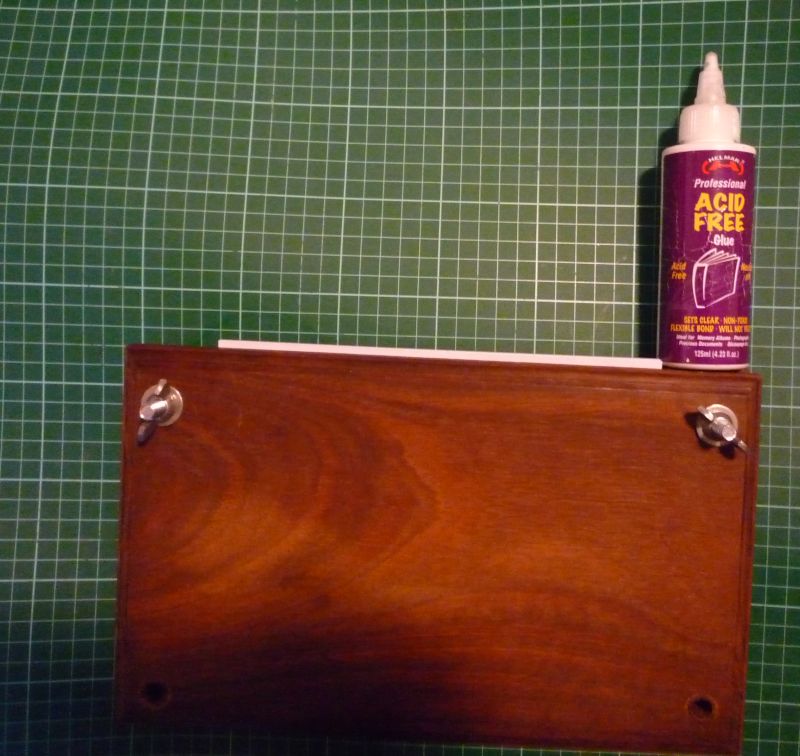
At this point you have a few options.  First of all, I like to rub a little bit of glue into the knots at each end.  This is just a bit of extra security to ensure the knots won't work their way loose over time.

Next, we want to glue something onto the spine to give it a bit of extra support and to ensure that there is no gap between sections that might look unsightly.  This can either be a strip of paper cut to the width of the spine and running from the top stitches down to the bottom, or a piece of fabric.  I like using fabric for the extra material to attach the spine by (see Part 5) but the choice is yours.  Using your finger, put a thin coat of glue evenly on the spine.  Don't use too much glue or it may seep inwards, gluing your pages together.  Centre your paper or material and glue down.  Let this dry.

At this point you are done- your pages are secure and should stay that way for at least the next hundred years or so.  Put your text block somewhere safe and let the glue dry.  The next section will talk a little about little touches you can add at this point to make your book special while after that our attention moves to the covers.  Hope this was helpful to you all!

Wednesday, 29 June 2011

Binding book pages together- single page or folded page method

This method is to bind single pieces of paper or a number of individual folded pieces of paper together.  This method is a variation of the sort of binding used for paperback books and uses glue to hold the pages together along with a piece of fabric for extra strength.

That said, this is not my favourite method for something you want to really last.  Just as pages can fall out of a old paperback book, with wear they can potentially fall out of books made this way and for the same reason- glue can degrade over time and once there isn't enough glue to hold the pages, out they come.  I also have not used this method myself to bind single pages together.  It should work fine, but there may be a greater chance of pages falling out as the glue has less area to grip on for each individual piece of paper.  If you try it yourself, tell me what you think!

What you will need:
Use a thin, light weight fabric slightly shorter than your book's spine and the spine width plus 5cm
  • Your pages to bind.  while it doesn't matter if the edges not to be bound are neat, the edge that takes the glue must be straight
  • Some glue.  I use a acid free pva glue (also known as white glue, carpenters glue, wood glue, school glue depending on where you are from).  Being acid free it is not going to degrade the paper over time.  It also is designed to not yellow, set clear and, most importantly, have a flexible bond.
  • A piece of thin, loose weave fabric.  Thin because we don't want too thick fabric to deal down the track, and with, loose weave as it allows glue to pass through easily.  The fabric should be about a centimeter (half an inch) shorter than the length of your book spine and the width of the spine plus about 5 centimeters (2 inches)
  • Something to clamp your pages in.  Mine is actually a large flower press- two thick pieces of wood with holes drilled in each corner for large bolts to pass through, held in place by wing nuts but you can easily improvise something similar with some scrap timber and some bolts.
All the pages folded, note how the book will be composed of individual folded pages.

If you are going to use folded pages, take your pile of pages and fold them, making sure all your creases are nice and sharp. Also make sure that your pages are in the right order- you don't want to finish making your book only to find out at the end that page 53 comes before 27!

Folded pages, ready to go
You'll probably find if you are using folded pages that you end up with a bit of a bulge when the pages are put in a pile due to the folds.  That's OK- just make sure your creases are as sharp as you can.

Your first step is to put the pages into your book clamp.  It is absolutely vital that your spine is perfectly even.  The easiest way to ensure this, is to have your spine flat.  Then you can use a flat surface to tap your pages.  However, you can use a slight outward bulging curve.  The key though is that the spine is even.  If any of your pages don't make contact with the glue in the spine then there will be nothing to hold them in place.


Book pages clamped in.  Note how little of the pages are exposed.

Clamp the book so the spine sticks out only  about 3 mm (1/16 of an inch).  This keeps the pages from moving.  The pressure also prevents glue from seeping too far into the book, sticking all your pages togther- we just want the book to be glued at the spine!

Another view of the book pages clamped in place
Glue on spine
Take your glue and run a thin line down the length of the spine.  Then use your finger to smear the glue out- you must ensure that all pages get covered by the glue.  Use a bit of pressure to force the glue into every crack and cranny.
Smear the glue into the spine well (sorry for the bad quality- it's hard to take a photo one handed while using glue with the other!)
Leave the glue to dry, then add another coat the same way.  Leave to dry again.

Add more glue the same way, but this time place your piece of fabric, centered on your book.  Run your finger over the fabric to work the glue through the material to ensure it makes good contact.  Leave to dry, then add another coat of glue over the spine with fabric as before.

Leave everything to dry well, then remove the clamp from your pages.  Your pages should be nicely glued together- if you just hold the fabric on each side of the spine and lightly shake, nothing should fall out!  These bound pages (called a text block) are ready to be bound into a cover- stay tuned for the next exciting tutorial installment!