Showing posts with label Origami. Show all posts

Friday, 15 July 2011

Origami bag charm using stamps

Today was spent sorting out my bead stuff from three overflowing boxes, complete with a couple of exploding containers (and I just vacuumed yesterday... *sigh*).   But now I have things more or less sorted- at least as long as I don't buy any more stuff.

To celebrate I have a new project- a bag charm that uses origami Discworld stamps as decoration.  The stamps I've chosen to use are from the town Bonk and feature bats on the original stamps.  I thought it might be fun to make little bat origami figures with them.  When I trawled the internet I found a number of different bat versions out there so I tried each of them.  I also made a little flapping bird just because I could.
If you wish to turn these into bag or jewelery charms we need to stiffen them up a bit.  But first, let's put a hole in the paper so there is some way of adding them to a jump ring later.  A safety pin does this well.

To stiffen up the origami, you need a sealer of some sort.  Varnish would work, but I like using Mod Podge.  It comes in several different finishes, matte, gloss and satin, which is what I used in this project.  Several coats will probably be necessary and a toothpick through the hole can be a useful stand to hold things while drying.

Once they are dry and firm, pop a small jump ring through the hole you made (you may find it necessary to redo the hole with your safety pin).
At this point you can do all sorts of things!  For the bag charm, I first made a 5 cm full persian chain.  To one end I attached a large lobster clasp so I can easily attach it to my bag zip later.
Then I add three different lengths of chain to the origami and join these to the chain I made.  And that's that!
Origami stamps are great for jewelery and for light use tasks such as this, although I would not try and use it for something like a key chain.  I suspect they would be too battered in a pocket with a bunch of keys to survive long.  We'll see how well they survive on my handbag!

Tuesday, 21 June 2011

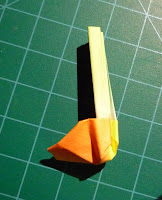
Make an origami spoon

The finished product
Ok, so when you think origami models, kitchen utensils may not be the first thing to come to mind.  But for reasons of my own I was after an origami spoon.  Since I couldn't find one, I mucked around a bit until I came up with something that worked.


Start with a piece of paper.  I used square when making this tutorial, but you can use a rectangle if you like.  If you use a rectangular piece, start with the paper as landscape (ie, make the first fold along the longest length).
Fold the paper in half and open again.
Fold the two top and bottom edges into the middle.
Fold the top and bottom edges into the middle again.
Open up the folds from the last step.
Take the bottom corner and fold up to the top and then unfold.
Take the top corner and fold down to the edge and then unfold.
Valley fold the paper at the point where the two preceding folds meet the edge (if you started with a square piece of paper, this will be the middle, if you started with a rectangular piece of paper use the fold lines to guide you).
OK, describing this is a little tricky.  Using the diagonal folds to guide you, form a triangle shape (for those familiar with origami, it is a balloon base top).
Turn over.
Fold in the top and bottom edges into the middle (along previous folds)
Fold the top and bottom edges into the middle again (to form the spoon handle).

Turn over and use a finger to open up the triangle section to form the spoon.
Fold the two corners into the spoon.

Tada! You are done.

 And why?  Because I wanted to do something with an Anoia discworld stamp.  And as everyone knows, Anoia is the Goddess of things that get stuck in kitchen drawers.
Besides, it's easier than trying to come up with a origami egg whisk :P

Origami fun

I got a new book yesterday and spent the afternoon happily working from it.  The book is 'Origami Jewellery' by Ayako Brokek and, not surprisingly, talks about how to make jewellery using origami.  This is something that I have dabbled with a bit in the past, but the book is useful as not only does it give jewellery design ideas, but it the diagrams are also suitable for smaller models.  While there are some lovely origami models out there (many that are beyond my skill level anyway) trying to make them out of small paper just isn't possible.

Why?  Well aside from the fact that things get fiddlier the smaller the paper, there is also limitations in the paper itself.  Remember the old fact that you can't fold a piece of paper in half more than seven times?  Well it's not entirely true- there is a Mythbusters episode that demonstrates this fact. However, they started with a really really big piece of paper and they also used a steam roller for the last one or two folds!  As paper gets smaller, it gets even harder- the thickness of the paper means that each fold is slightly bulged at the crease (take a piece of paper and fold it repeatedly and you'll see what I mean).  This influences the model far more on a small model than a large.

So some models have worked better than others, although I'm fairly pleased with the results for a first attempt.  These are experimental for an idea I have- which will use paper even smaller (yes, I know.  I'm mad, but I have a reason!).  The lines on the cutting board are centimeter marks and all the models were made from paper the size of the square shown- you can see how some models shrink in size!  The poor little owl (next to the square of paper and under the butterfly) has a very rounded head thanks to the relative thickness of paper.  I think I'll try a drop of glue to help hold him together in the final result.

But interesting side note- while checking a few things online for this post, I found a site that demonstrates that a piece of paper CAN be folded more than eight times.  In fact, they got to twelve folds!  Britney Galivan, the woman who figured it out, was both sneaky and clever.  She used an extremely long strip of paper and then worked out a way to fold the paper.  Impressive!

Now I'm going to head back and move into phase 2 of my grand plan (mwa hah hah hah.... erm, sorry).

If you want to try yourself there are some great sites online with diagrams and videos.  Just type origami instructions or origami diagrams into your favourite search engine.  Do start with something simple to start with- while that lovely dragon pattern looks fantastic, you will find it far better to get some skills under your belt (or fingertips), lest you end up with a large pile of origami rocks (take paper, scrunch up, throw away in frustration- repeat).