My Dad is an amateur magician. While this is the sort of thing that initially sounds incredibly cool, it does mean that growing up there was a lot of time spent as a guinea pig for a new (ie, unpracticed) trick. Magic books will always say to practice in front of a mirror when learning a new trick. Apparently what they also say in special magician-visible only ink is 'unless you have kids, in which case just practice this new trick in front of them. They'll love seeing the 473rd card trick that you've never done before and will drop the cards or have to leave halfway through to reset the mistake you made'.
Love you, Dad!
What it also means is that I've been asked if I could make some interesting things over the years. The most recent request was if it was possible to make sponge balls. My first go-to search was the internet, but there was surprisingly little information out there. So this post is about some of the first experiments I've made in making sponge balls. This is still very much a learning process so suggestions are more than welcome! As I experiment I hope to come back and post more.
First, let me preface this with if you just want simple circular (or square) sponge balls, go buy them from your favourite magic retailer. Trust me, the amount of work that you will need to do, particularly if you want a simple shape that will be hardest to sculpt perfectly, you are far better off going and buying a set. If you want a round set but in a custom colour, buy a white set and then read on for ways to dye and colour them. But if you want a custom shaped sponges
Material
So let's start with material. What you need for a good sponge ball is, not surprisingly, sponge. But there are many, many types out there and it is very important to select the right material. For my first experiments, I'm using some foam that Dad acquired as off-cuts from a foam and rubber store. This is a great way to get stuff to do first experiments with as it is cheap. However, the stuff I have is a little denser than some of Dad's real sponge balls so does not compress as much as a sponge ball. I've experimented with freezing samples soaked in water to see if that softens them up at all but it doesn't make much difference.
You also want to get as pale or white a colour as possible (unless you manage to find foam in just the right colour). It is possible to dye the sponge to a darker colour, but it is next to impossible to get a white/light colour from a dark sponge without compromising the squashablility or the usable life of the ball.
Sculpting
So far I've found the best tools to have on hand are scissors. Specifically, I have two pairs. One big pair that is tough enough to cut through the thickness of the foam I am using. I've also seen suggestions to use an electric carving knife. The big scissors are for obtaining the working piece of foam and to do the crude shaping. The small pair I have have a fine point- the small size is important for rounding and the fine tip is
essential to be able to pierce and cut into the foam from the surface for shaping.
I first cut out a piece of foam a bit bigger on all sides than the final shape. The next step to roughly shape it. For example, if you are after a roundish shape, cut away the sharp sides to get a hexagon in one direction, turn 90 degrees and then repeat. Be careful at this stage however if you want to have things like ears or other 'sticking out bits' that you don't go too far, if you make a mistake you can't restick the foam! You may find using a WATER based texta/marker/pen useful to mark your foam before you cut it to establish what needs to stay and what needs to go.
 |
The three basic steps I take to shape a creature spongeball
(in this case, a blue angry bird) |
Once you have your shape roughed out it's time to switch to the small scissors. Very carfully start to shape your foam. For things like ears, noses or anything else, use the fine tip to pierce the foam and cut out in one direction, then use your fingers to create enough stretch to show where you cut. Use the scissors side on to the original cut to trim away the foam on the deeper side. For example, if making a circular nose, first use the scissors front on to cut into the foam in a circle shape. Then trim away the foam in the area around the nose so the nose is now sticking out from the main body. Finally trim the nose to round it off.
You may find that your finished result is good enough for your purposes. If there are any small bumps in what is meant to be a smooth rounded shape, I found using small fine sharp scissors and 'trimming' very very lightly in that area helps. Focus on moving the sponge and keeping the scissors still and removing a 'hair' at a time. If you try and take a short cut here, you will end up making a flat area instead.
When the sponge ball is completely shaped to your satisfaction, that's when you pull out the sharpies. I now have a shoebox of about 50 sharpie (and non-sharpie brand) pens because it seems next to impossible to get just the right shade at times. TEST COLOURS BEFORE USE! Both on paper and on scraps of the foam you used, particularly if your foam was not white.
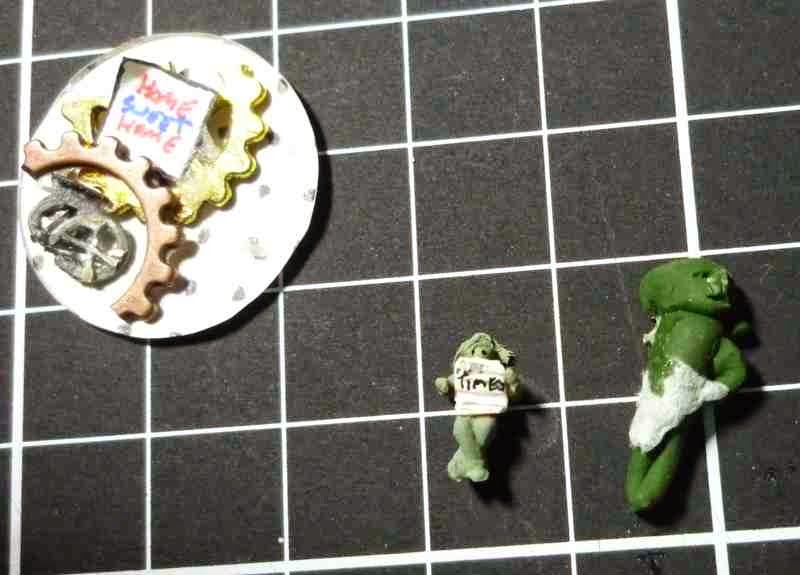
 |
The sponges I've made for Dad
(at least the ones I he could find today) |
To get good coverage that goes into the sponge, I found stippling (lots of dots close together, pushing the nib into the sponge) the sponge with the pen was most effective. And it's a good idea to do light, small features such as eyes, beaks or mouth, before main body areas.
If you were stuck with a non-white sponge like I was, very small areas can be made white with acrylic paint. However, this does make the sponge in that area much stiffer. Not good if you want to be able to squash it up.
It's a fun process and one I can see me playing with a bit more in the future- particularly if I can source a good white, squishy sponge. There is definitely a learning curve (I started with the yellow bird, then the pig, and then the blue birds) and slow and steady is most certainly the way to go. There is no sticking bits back if you cut off something you shouldn't and you will end up with lots of bits of sponge everywhere (static means even if you do this over a bin like I did, you still end up with bits finding their way around the house). If anyone else tries this, send me a pic or a link- I'd love to see!


.jpg)


